
Drywall Installation
Contact Us

Many home improvement projects in the United States need some drywall installation and repair. It would help if you had some helpful tips on correctly installing a drywall and taping the finished product to a flat, smooth finish. You will not get the best product unless you use the right processes.
That is why it is essential to understand the product and how to use it fully. Even though you will have professionals do this work for you, it is good to know what the process entails to verify their working processes. You don’t want to discover that these people did a shoddy job after leaving the job site.
West Palm Beach Popcorn Ceiling Removal & Drywall Pros will help you work on any drywall repair and installation project. With so many years of experience in the industry, you can be sure of getting nothing but the best from our professionals.
These are experts in both commercial and residential drywall repair and installation works.
The Available Drywall Options
There are four thickness options for residential drywall. They are 1/4″, 3/8″, 1/2″, 5/8″, and 5/8″. One-inch thick drywall is ideal for firewalls in multi-family houses. There are several types of drywall: green-board is a moisture-resistant, lightweight drywall that is still new in the market, and mold-resistant drywall.
1/4 inch drywall commonly covers a structurally sound but cosmetically damaged wall. It can be bent slightly and was used in some home construction years ago. The most popular drywall product for single-family home construction is 1/2″. In some areas and applications that require a fire rating, 5/8″ is the right drywall product. Asking experts for advice on the best product to apply in your case is essential before embarking on this exercise. Remember, this is an investment, and you don’t want to lose your money at the end of the day.
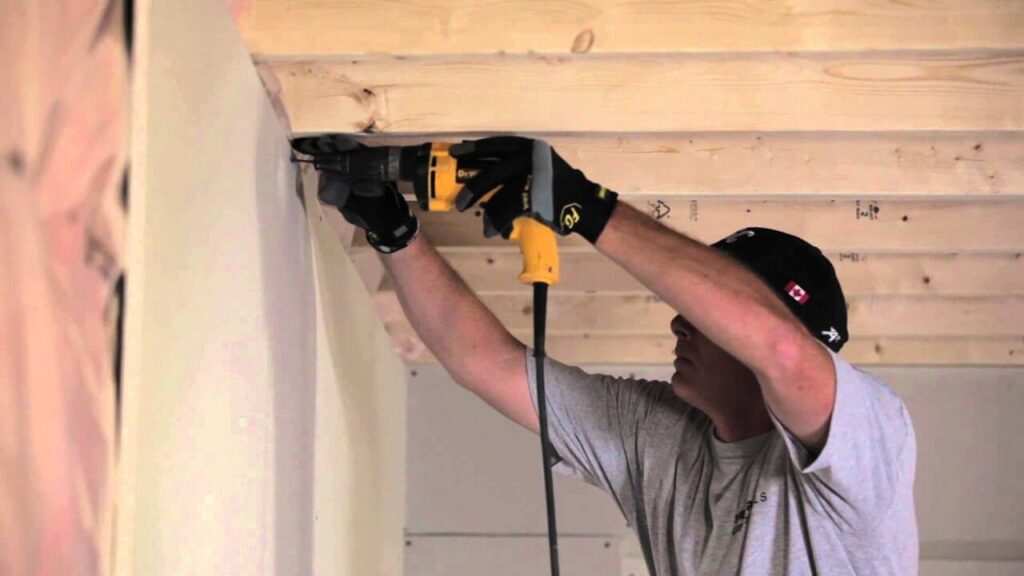
How to Install Drywalls
It is an easy task to install drywall. Drywall is available in sheets 4×8 feet but also in lengths of 10×12′ and 12×12′. Drywall is placed horizontally along with the framing members. For maximum bonding, the drywall must be glued and screwed.
Ring shank nails are acceptable. You can cut drywall by scoring the face with your utility knife and snapping it. The Roto-Zip can also be used to cut drywall.
Drywall Finishes
There are two types of “mud,” or taping compound, for finishing taping drywall. The first comes pre-mixed. It will dry over time, usually within 24 hours. The second one is the powder type, which you mix with water and set in a set period. You can apply either one using the same method, except that the available time is the amount of time you have to work with the product before the product sets or begins to harden. I prefer the setting option.
Do You Have the Right Tools?
The success of any job depends on having the right tools. I recommend that you have a metal tapping trough, an incredibly stiff putty knife as long as your trough’s bottom, a 6-inch blade with moderate flexibility, and a 12-inch cement finisher’s trowel.
There are a few reasons I like the cement finishers’ trowel. It is easier to feel and less flexible than a 12-inch taping blade, and it can be used to tap and finish concrete. That is why hiring professionals to help you with this kind of work is essential. The experts will always carry the right tools to the job site and make sure that they do everything professionally.
How to Install the Drywall
Sheetrock EZ – Sand from USG is an excellent tapping/patching product. There are five minutes, 20 minutes, 45 minutes, 90, and 90-minute setting times. I use the 45-minute and 20-minute products almost every day. You can speed up any products by mixing them with hot, not room temperature water.
Many people think that beginners will sand the surface with mud. It is not only a waste of product and sandpaper; it’s also a lot more work, especially if the area you are taping is large.

Your tape should be placed over the holes or seams and extended beyond the tape’s edges. I prefer the self-adhering nylon mesh tap, as it is easier to work. The “mud” should be mixed to peanut butter consistency.
Spread the mud using a 6″ taper blade over the patch area until it covers the tape. Do not worry about feathering or blending it. The first coat should be just covering the tape.
After the coat sets, take your taping knife and run it across the first coat. It will help to remove any ridges or loose materials. Mix another batch of the mud until it is similar to mayonnaise.
Next, we’ll feather it out. Your 6″ blade should be placed in the center of the tape. The other edge should be to the outside. Spread your mud. Do this for all four sides.
Use your 12″ trowel after you have completed the coat set to smoothen any ridges and loose material. You should still be able to see some of the mesh tape’s outline if you don’t want to get too excited about the thickness of the mud you have applied. Mix another batch.
Make sure it is a bit looser than mayonnaise. Use your 6″ knife to spread the paste all over the patch. Next, take the 12″ trowel and hold it at a 45-degree angle towards the wall. Now slide it over the patch. After completing one side, resist any urge to remove the trowel from the wall.
Instead, use a curving motion to continue to the next side. You might have to stop and re-start if there is too much mud. The better your finish, the more you can keep going. The goal of this coat is to finish feathering and fill in any voids.
You can sand the area after the last coat completely dries, usually 24 hours. You can sand it with 120 grit screen sandpaper. After you are satisfied with the surface, rub your palm on it. You should be able to feel any drips or ridges. Add another coat of mud if you feel the need. Then sand it again.
To remove dust, wipe the area with a lightly dampened sponge or rag once it is scorched. Let the moisture dry for at least 30 minutes before priming and painting.
These are the essential details to help you manage your drywall projects. It is crucial to complete the steps correctly to achieve a quality project. Visit my blog to view a video that demonstrates drywall repair.
Many homeowners prefer Basement drywall. You might be thinking the same thing. These are essential considerations even if you don’t have the expertise to install drywall in a basement. These are some key advantages you should keep in mind.
Cost of Drywall Installation
The overwhelming reason that drywalls are so well-liked is the price. Drywall and sheetrock are cheaper than other materials. Drywall or sheetrock is a good choice if you’re on a budget and want to improve the look of your basement.
Installing drywalls does not have to cost a lot. You can do it yourself (DIY) as long as you are an expert in the industry. Don’t install drywall unless you have the skills and ability to work with your hands. You may end up doing more worse than good to your surface. Many online guides show you how to measure, cut, and install drywall. Therefore, if you are looking for affordable construction options, drywalls should not miss on your list.
More Ceiling Space
A basement’s low ceiling is what causes the most problems. A basement renovation can be challenging due to the low-placed ceiling boards. There are many decorating ideas and tricks that can help increase space.
You can also limit the space that a ceiling panel takes up. Drywalls are the ideal solution for your ceiling. Unlike other ceiling materials, basement drywall requires very little space, so you don’t have to give away valuable ceiling space.
Smooth Finish
A drywall job can make your basement look fantastic and smooth. This step will improve the appeal and comfort of your basement. It is vital for homeowners who need the basement to host guests. The perfect look for any guest is achievable with drywall.
These are just some of the benefits that drywall has over other materials. Basement drywall has its disadvantages, just like with most things. When choosing a material, homeowners should think beyond aesthetics and price.
With this guide, you now understand how to install drywall and the benefits of this product. The most important thing is to have the right professionals handle this work for one. West Palm Beach Popcorn Ceiling Removal & Drywall Pros will not let you down if you want the value for your money.
We have been dealing with drywall installations for 20+ years. With our company, you can be sure of getting all the benefits of installing dry walls, including a smooth and stable finish. For more details on the same, feel free to call or email us today. You can be sure of getting nothing but the best from our contractors.

Locations We Serve
We offer the above services at the following locations within West Palm Beach:
If you are located in Palm Beach County and you don’t see your city/area listed above, don’t worry! We cover all of Palm Beach County. Fill out the contact form above or CLICK HERE and send us a message. We’ll get back to you asap!